Do this every morning to relieve back pain

SUMMARY
There are a lot of reasons for back pain. Many of them are real, and nearly all of them are 100% treatable without a doctor.
What I'm giving you here is the exact protocol you need to be doing in order to relieve your low back pain once and for all.
Whether it's your disc, your muscles, your tendons, your actual spine, or some combination of them all, there is still plenty you can do to treat your pain yourself.
This is about taking control and responsibility of your body. You're a Grown Ass Human who shouldn't be dependent on someone else to treat your issues.
I'm gonna give you exactly what you need in 5 simple steps that you can do every morning with nothing but your body weight and those little eye crusties still hanging out on the corner of your ocular cavity.
Step 1: Awareness: Move your pelvis
How are you living in your pelvis?
Are you anteriorly tilted?
Are you posteriorly tilted?
Are you neutral?
Are you already confused?
When you walk around, you have a tendency to 'hang out' in one of these positions.
If you're overly anteriorly tilted, your pelvis is "facing forward." This usually means you have weak glutes, weak abs, and tight hip flexors.
If you're posteriorly tilted, your pelvis is "facing backward" or level (slight forward/anterior tilt is considered normal). This can mean that you have tight glutes, tight abs, kyphotic posture (a rounded upper back), or all three. I'll get into kyphosis in another article. For now, this article on posture should satisfy your kyphotic curiosity.
BUT, for most people, these words mean nothing. Maybe you're one of those people. That's what this first 'exercise' is all about: building awareness between your mind and your hips.
It's especially easy because you can just crawl out of your bed on your hands and knees and never have to actually stand up. This is a great bonus for those of you who are especially lazy in the morning.
A cat/cow sequence is how we are going to achieve that awareness. Check out the video for exactly how to flow through cat/cow.
Perform the sequence for 1-2 minutes or until you feel aware, and your hips are "awake" daily.
Step 2: Pain relief: The JC low back sequence
JC is a savior for many of us in the fitness industry. I'm talking about Jeff Cavalier over at Athlean X, of course. He has consistently put out amazing high-quality fitness information for years now. He is one of the few Fitness Youtubers that is truly above reproach. I aspire to be like him.
Down to low back pain business...
JC has provided us with an exercise that is going to provide you with some immediate relief. By starting each morning with the JC Low Back Relief Sequence (JCLBRS for you military nerds that love acronyms), you're going to get pain free and gain more awareness.
Specifically awareness of how to use your glute medius, which is the weak glute causing your low back to take the brunt of your weight and in turn, causing pain.
Check out the full video above of me walking you through it and the video attached to this section to see JC walk you through it a second time.
Perform the sequence one time on each side daily. The sequence includes a set of 5-10 reps and then the burnout hold.
Strong glutes useful in: force production, fighting, the bedroom, and pain relief
(https://www.grapplearts.com/develop-powerful-bridge-bjj/)
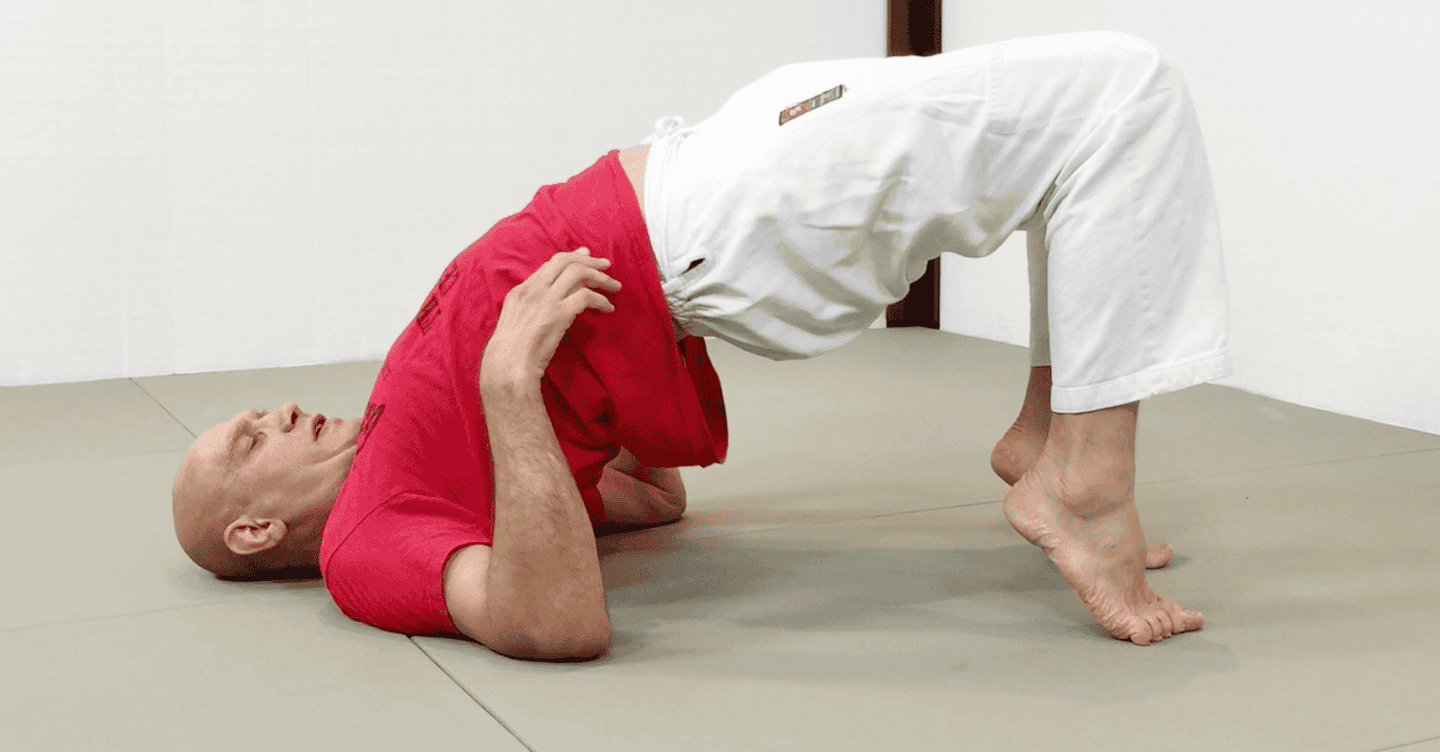
Step 3: Butt strength: Bridges
Time to take that newfound glute, hip, and low back awareness and apply it to some movement.
Elevated bridges are the perfect way to do just that. You're going to be teaching your glute medius how to operate under a horizontal load (like what happens when you walk, run, or hike). You're also going to learn to properly concentrically contract your spinal erectors, without hyper extending them. Lastly, you're going to train how to posteriorly tilt your pelvis to get a maximum contraction in your posterior chain.
That's a lot for one exercise.
Perform 2-3 sets of 10-20 reps daily.
Here's some more on how to train your low back in a smart and safe manner.
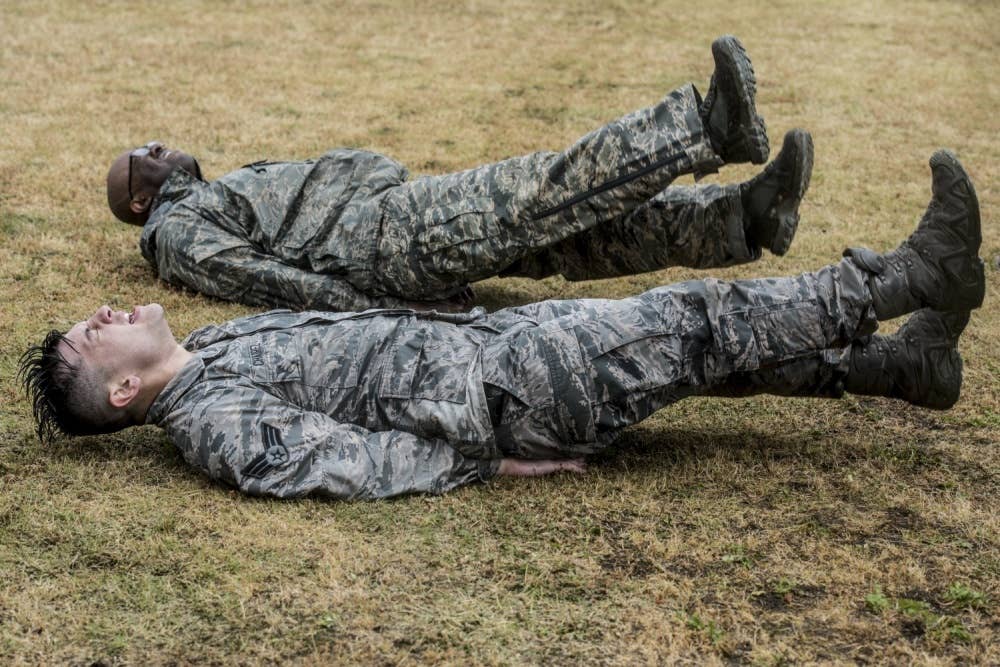
Flutter Kicks rely heavily on engagement from the hip flexors. AVOID them and other exercises like crunches and sit-ups if you have tight hip flexors and/or low back pain.
(U.S. Air Force photo by Machiko Arita)
Step 4; Core strength: Side plank
Time to work your abs. Why? Because that's how you attract a mate. Everyone knows that core definition is the singular way that most people choose a life partner, so of course, we need to do them every morning.
The real trick here is to choose an exercise that's great for your core stability and building a shredded six-pack without working your already overactive hip flexors and potentially neutralizing the effect of the previous three steps. So don't do the crunches from your PT test.
You're going to do that with the side plank. But a real side plank, not that shit I see checked-out field grade officers doing during PT (looks like they're just hanging out waiting for retirement.)
Watch the video for exact form cues. You're going to:
- keep your hips stacked,
- keep your abs actively flexed by shortening the distance between your lowest rib and the top of your hips, this will also keep your spine in a neutral position
- Keep your hips neutral/slightly posteriorly tilted by keeping your glutes engaged.
- BONUS: abduct your top leg AKA lift your leg for additional core stress and some more glute medius work.
Perform 1-2 sets of 75% effort on both sides each morning. This is about training proper movement and muscular engagement, by staying at the 75% effort threshold you won't push so hard that your form breaks down and potentially makes your low back issues worse.)

(Courtesy photo by the Indian Army)
Step 5: Spinal decompression: Hanging out
Time for some relief. Hang from your pull up bar or a door frame and decompress your spine.
This is something you should do whenever you have a chance. We spend all day with gravity compressing our spine together. Your low back ends up taking most of that pressure. By decompressing at the end, you are taking an opportunity to "reset" your spine each day into the proper posture and form that you just spent the last 5 minutes training.
Perform this for 1-2 sets of a max hold. (You'll get some bonus grip strength work here as well.)
Here are some more great ways to relieve physical stress that you carry around all day.

You need to train in what you want to be good at... that includes not being in pain.
(U.S. Air Force photo by Senior Airman Nathaniel Stout)
When the results roll in.
You'll start to feel relief almost immediately, but it's going to take some time for all your pain to dissipate. That's why this routine should be part of your life for the rest of your life. Consistency is key here.
We use our bodies every day, so we also need to treat/correct our bodies every day. That's all this is.
If you want to feel something you've never felt before (like pain relief), you need to do something you've never done before.
Send me a message anytime to let me know how this morning routine is working to help relieve your low back pain at michael@composurefitness.com.
Don't forget to join the Mighty Fit FB Group to surround yourself around like-minded people who also want to get strong, lean, and pain-free.
SHARE