There were literally hundreds of small-scale operations on D-Day that added up to the full, Great Crusade that General of the Army Dwight D. Eisenhower spoke of in his pre-invasion orders. One of those, Operation Coup de Main, included just 180 men in a handful of gliders landing practically on top of enemy anti-glider poles. Then they had to charge out of their wooden gliders before the Nazi machine guns could shred them. And capture two mined bridges before the Germans could blow them up. Then they held them for hours against armor and infantry attacks from over 12,000 men.
Success at Pegasus Bridge, as it is now best known, would allow entire divisions to make it from the D-Day beaches into Fortress Europe. Failure would likely result in the envelopment and destruction of the men as well as the bridges. That would bottle up Sword Beach and make it more likely that troops landed there would be vulnerable to Luftwaffe and panzer counterattacks.
Senior leaders told the German commander there, Major Hans Schmidt, that Pegasus and Horsa bridges were the two most important points in Normandy.
So, no pressure. Easy peasy lemon squeezy.

A description of Pegasus Bridge and Horsa Bridge
The ground at Pegasus Bridge is fairly simple. First of all, there are two waterways running north-to-south and two bridges. The Caen Canal runs nearly parallel to the River Orne. Pegasus Bridge crosses the canal, and Horsa Bridge crosses the river. The two are less than a half-mile apart with fairly flat land in all directions. A small village, Ranville, sits about half of a mile east of Horsa Bridge. The two waterways could form a serious problem for allied infantry and armor attempting to break out from the beaches. Eisenhower needed it held, and the 6th Airborne Division was in charge of capturing both bridges and defending them. While also destroying a nearby artillery battery and six other bridges that would’ve facilitated a German counterattack.
Preparing for combat
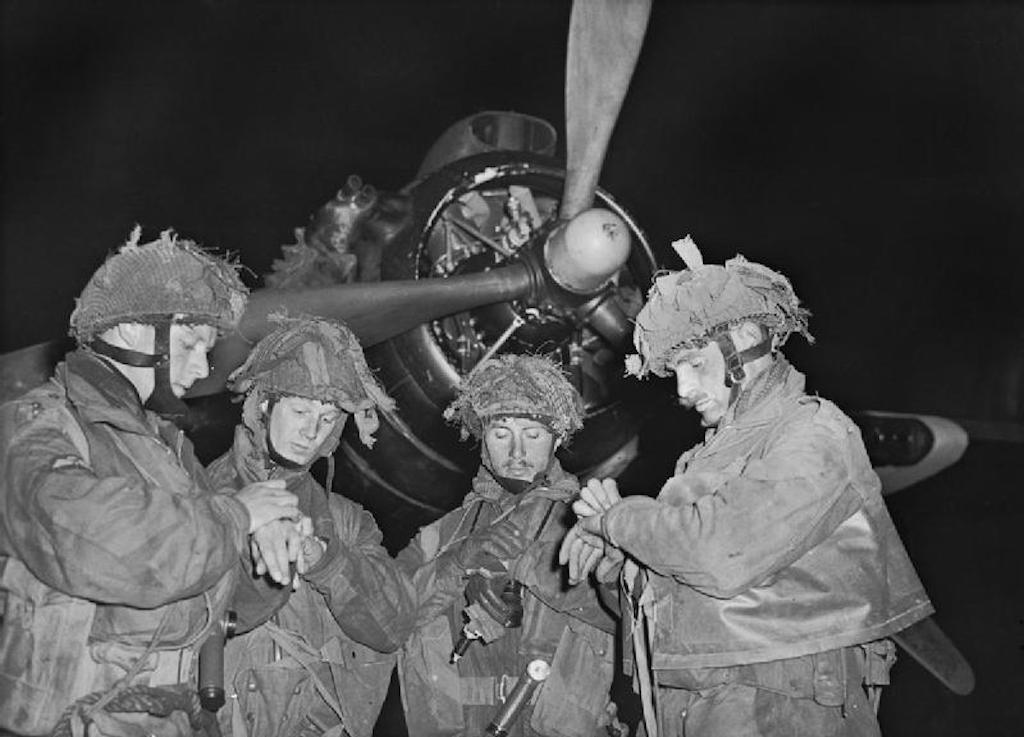
The 6th Airborne Division was barely a year old, and D-Day was to be its baptism. The task of capturing the two bridges intact was the priority. So it would’ve normally involved the lion’s share of the green unit’s forces. But a shortage of gliders and planes forced the division to put some of its soldiers onto troop carriers landing on Sword Beach in the week following D-Day. What troops could be landed June 5-6 had to be split among the three tasks.
Worse, reconnaissance photos leading up to the battle showed the Nazis had dug a series of holes. The spacing and size of the holes were familiar to the paratroopers: Anti-glider poles. No one was sure how fast the poles would go in, but each pole emplaced would shorten the landing zone for the pilots and threaten the lives of the assaulting troops. As the plan developed, commanders decided they could send only 180 soldiers to take the bridges and defend the surrounding territory.
Additional obstructions included a series of explosives placed on Pegasus and Horsa bridges so that the Nazis could detonate them before a successful assault.
A rough start at Ranville
Six platoons of Brits took off on the evening of June 5, riding in gliders towed across the Channel.
The initial landing near Pegasus and Horsa Bridges did not go well. First, the lead glider pilot couldn’t spot any of the landmarks he expected to use for navigation until they were just a few hundred feet above the ground. Next, it turned out that enslaved Italians were putting the glider poles in the very morning of June 6. The glider pilots touched down in the already tight landing zones assigned to them and skidded their way across the soil right into the poles. Luckily, they shed enough of their speed that the resulting crashes caused some harm but only one fatality. A paratrooper in a glider that snagged barbed wire was thrown from the aircraft. He landed in the canal and unfortunately drowned.
Shaken from the crashes, the men took precious moments to pull themselves together and assault out and toward the bridges. If the full defense had been in place on June 6, this delay likely would have been catastrophic.

Lucky Breaks at Pegasus Bridge
But at this point, a series of lucky breaks went to the British, most tied to the weather. The same bad weather that had famously convinced Rommel that he could head home to celebrate his wife’s birthday had also convinced the folks at Pegasus Bridge that no attack would come that night. So, first, Maj. Schmidt was not there, and he was the only one who could order the bridges’ detonation. Better, the explosives were not in place because he’d been more worried about a partisan attack.
But best of all? Despite hearing the noise of the bombers towing the gliders, the defenders were certain no attack was coming. Here, the limited planes available saved the day. A sergeant who heard the planes was certain that a real bombing or paratrooper attack would include more than six planes. So he continued his assignment of pulling four soldiers from observation posts near the bridges. Schmidt only had two sentries on Pegasus Bridge that night and no one between the landing zones and the bridges.
The attacking British shook the rough landing off, assembled outside the gliders, and assaulted. A burst of machine gun fire felled a lieutenant leading the charge, but the rest of the men scattered the defenders. The attackers at Horsa Bridge had only two of their three gliders when they landed, but were still able to take their bridge intact, also. At 0030, only 30 minutes into D-Day, the men were able to transmit news of their success using the radio brevity code, “Ham and Jam.”
A surprised Nazi at Horsa Bridge
The British surprise was so successful that Maj. Schmidt, who reportedly was enjoying drinks and snacks with his French girlfriend, assumed the flare and gunfire were a mistake and went to yell at the sentries. He ordered his driver to take him to the bridges as fast as possible.
The two drove so fast that they actually passed through the British lines unopposed and stopped on Horsa Bridge. The major exited the vehicle and looked for someone to yell at only to learn that he was being captured.
Unfortunately, Maj. Schmidt was not the only Nazi to head to the bridges. An armored counterattack almost immediately bore down on the paratroopers.

Surviving the morning
As the paratroopers were still digging small foxholes to lay in for cover, the sound of engines and treads arrived from the west. Panzers from near the coast were already coming to probe the British position. The airborne soldiers had few options for fighting tanks, but Sgt. “Wagger” Thornton emplaced and aimed the PIAT. The Projector, infantry, anti-tank had a reputation as being inaccurate and ineffective, but it was the best chance they had.
The first shot burst through the night and everyone tensed as they waited for the tank to fire back at its assailant. But a fireball indicated that the PIAT had drawn blood and the first tank was knocked from the fight. The rest of the tanks, not sure yet what they were facing, pulled back. This was a relief for the British who were not keen to take on an armored assault with their low numbers.
But the attacks did keep coming. The British suffered mortar, sniper fire, and even a bombing run as Nazis attacked their positions. Two more lieutenants were lost and corporals took over command of all but two platoons. Still, reinforcements from follow-on drops arrived in a timely manner. And the PIAT again shone as the men beat back an attack by two German gunboats. A PIAT round slammed home in the wheelhouse of the first gunboat, causing it to crash. The second boat withdrew. Another tank assault was stopped when a paratrooper hit it with a hand-thrown Gammon bomb. It was a sort of overpowered grenade used by British commandos.
Linkup with Sword and Relief
The paratroopers held out alone at Horsa and Pegasus bridges until early that afternoon. They suffered dozens of casualties while repelling counterattack after counterattack. But, at about 1:30 in the afternoon, they heard the sound of bagpipes approaching from the canal side, at Pegasus Bridge. British forces from Sword Beach had arrived to reinforce them. Additional troops throughout the afternoon would eventually relieve the tired paratroopers.
One of the reinforcements came with a welcome surprise. The missing platoon from the group that assaulted Horsa Bridge had survived their landing but had simply missed the target. They had spent the morning trying to fight their way to the bridges and made it in the early afternoon. With the platoon back, total casualties of the attack were 20 killed and 50 wounded. While a grim cost, that sacrifice allowed Britain a firm defense of Sword Beach and a perfect launching point for operations deeper into Nazi-occupied France.
The valor at Horsa and Pegasus Bridge helped crack open Fortress Europe and allowed the forces of freedom to carry the day and, eventually, the war.